
Here’s how you can make your own New Game+ save file while we wait for the folks over at Endroad to (hopefully) give us a replayability update.
How the magic happens
So you’ve finished the story, completed all the Vega bases and found everything there is to find in all 6 regions. Maybe now you might want to re-experience the entire game with all those juicy upgrades you worked so hard to get. Well here I’ll show you how to do this in the current version available (as of me writing this).
Here’s what you’ll need:
- Notepad
- A few minutes
Be sure to backup your save file before doing this,
I explain how to do it in the steps bellow.
Step 1: Start a new game
This is the file we’ll be editing later.
Step 2: Find your save file
The game’s save files are located here:
%USERPROFILE%\AppData\LocalLow\Microids\UFO ROBOT GRENDIZER – The Feast of the Wolves\savegames
Again, make sure to create a backup copy of these before modifying them.
Step 3: Editing your save file
In the “savegames” folder, you’ll notice there are more than one save file. The game automatically creates them as you progress through the story in case you want to backtrack and replay a previous part.
For this simple mod, we only need to care about the save.flbk file.
Open the file in Notepad or any other text editing tool you prefer. I’ll use Notepad here as it is the most commonly available. Once you have it opened, find this specific line of text:
"SkillTreeID":["Y_UPGRADE","CLAVIC_UPGRADE","RETRO_UPGRADE","METEO_UPGRADE","X_UPGRADE"],"SkillTreeLevel":["1","1","1","1","1"],"UnlockSkills":["","",""]
and now replace it with this:
"SkillTreeID":["Y_UPGRADE","CLAVIC_UPGRADE","RETRO_UPGRADE","METEO_UPGRADE","X_UPGRADE","FLURRY","FULGURO_UPGRADE","FINISHER","CORNO_UPGRADE","ASTERO_UPGRADE","ENERGY_BAR_FULGURO","ENERGY_BAR_ASTERO"],"SkillTreeLevel":["4","4","4","4","4","1","3","1","3","3","1","1"],"UnlockSkills":["","","","FLURRY_RUSH","FULGURO","","AXE_BUFF_LVL_1","PUNCH_BUFF_LVL_1","FINISHER","CORNOFULGUR","CORNOFULGUR_REGEN_ENERGY","ASTERO_AXE","CORNOFULGUR_REGEN_LIFE","","ENERGY_BAR","ENERGY_BAR","","","ASTEROAXE_UPGRADE","AXE_BUFF_LVL_2","","","METEO_GRAB_ARMOR","PUNCH_BUFF_LVL_2",""]
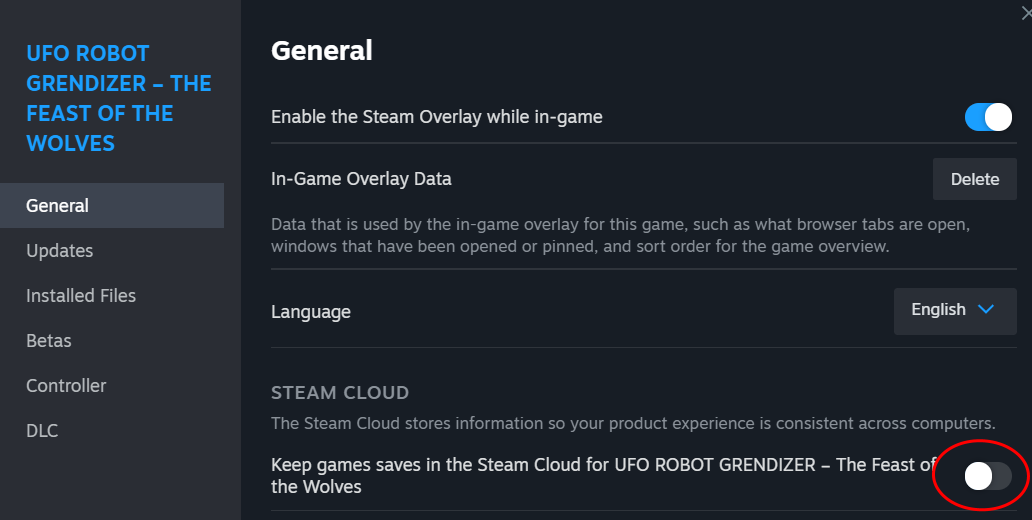
Step 4: Turn off steam cloud and launch the game
Extra notes
Now you can paste that text over to the new save file, just like how it is explained in step 3.