
How to view and edit save files, to change a character’s name, move an old character to a new world, and so on.
Introduction
With that said, let’s get started.
- An app capable of reading AND WRITING gzip files (Recommended: 7zip)
- A decent text editor capable of editing XML files (Recommended: Notepad++)
Both of the above recommended apps are free.
As always with this sort of work, you should make a backup of your save files.
For most people, you saves will be located at:
C:\Program Files (x86)\Steam\steamapps\common\Outward\Outward_Defed\SaveGames\
Decompressing and Recompressing Your Save File
This is probably C:\Program Files (x86)\Steam\steamapps\common\Outward\Outward_Defed\SaveGames\.
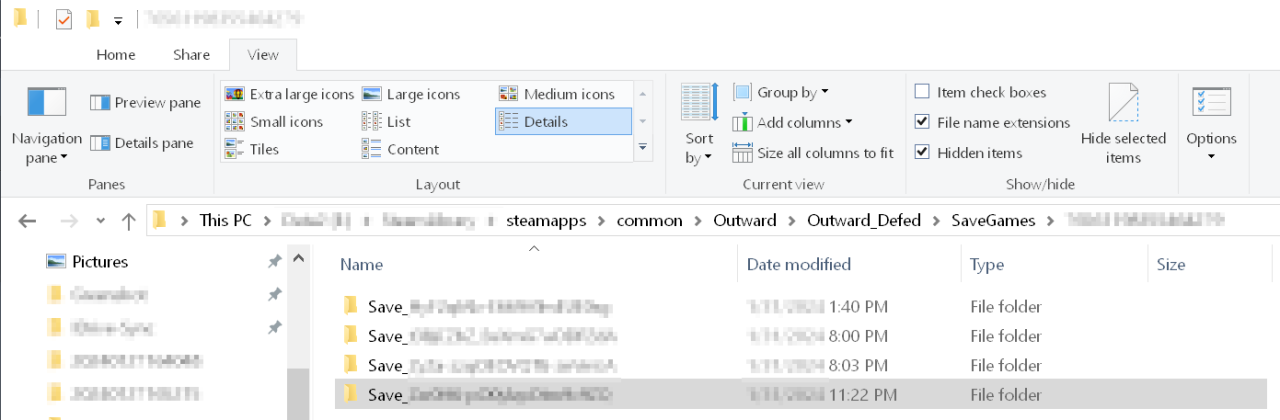
Once you are in the save games folder, you will see another folder with a long string of numbers. Go ahead and open it.
If you only have one character/save, skip this section.
In this folder, you will see potentially one to many different folders starting with “Save_“, depending on how many characters you have. Your first step will be to locate the correct folder for the character you want to edit.
The easiest way to do this is to start outward, load up the character you want to edit, and then quit (triggering a save). You can then sort the folders by the “Date Modified” column and see whichever one was modified just a moment ago.
Inside the Save_###################### folder, you will find still more folders. This is the game’s internal backup system. Simply go to the most recent folder (Sort by “date modified” if needed), and there you will find “Char0.defedc“.
Use 7zip to extract this somewhere (Right click -> 7zip -> Extract), ideally not your save folder. You should then have a file simply titled, “Char0“.
Use Notepad++ (Right click -> Edit with Notepad++) to edit to your liking. Details are in other sections.
When you’re done editing, right click your “Char0” file, select “7zip” and then “add to archive.” In the window that opens, MAKE SURE to select “gzip” under “archive format”. Everything else on default should be OK.
You should end up with “Char0.gz“. Rename this to “Char0.defedc” and then place the file back where you found it.
This means the file either wasn’t repackaged correctly, or you edited it in a way that the game won’t accept – and so it rolled back your save to the previous version. Try again!
The Meat of Editing Your Character Save
If you followed the above section, you should have a “Char0” file that you can use with pretty much any text editor.
Changing your name from this point is pretty simple. Assuming you’re using Notepad++:
Right click the file and select “Edit with Notepad++”
Within Notepad++, press Ctrl F and search for “<Name>” (or alternatively, search for your character’s name). You should send up near a section that looks something like this:
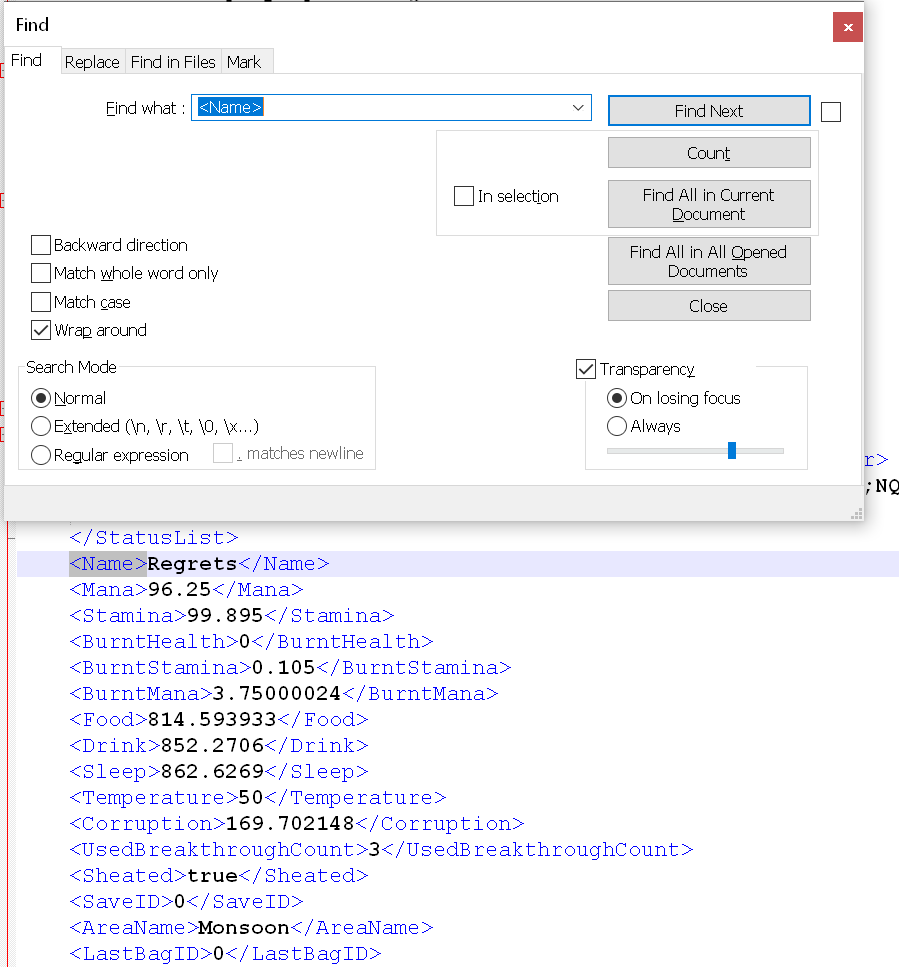
Change your name as desired (though I wouldn’t recommend anything the game itself wouldn’t accept).
Save the file, then return to the previous section for details on how to package up the save again.
You may have noticed some other values there.
Nearest to name is your character’s vitals and needs and so forth. You can edit those to your liking. Max mana, health, and stamina varies with your character’s progression. Food, Drink, and Sleep max out at 1000. Temperature 50 is neither hot nor cold. UsedBreakthroughCount can be set to 0 to get back your breakthrough points.
If you scroll up, you’ll see VisualData. If you want to change your character’s appearance, you can do it here. If you’re not sure what the numbers mean, you can make a new character that looks like what you want, and then copy over the VisualData section.
This is possible but gets trickier. That long jumble of letters after the “Save_” part of your save folder’s name? If you’ve been exploring, you may have noticed that’s in your character’s “Char0” save file too. To get an old character into a new world, we’ll need to do some surgery.
So, here’s what to do:
This is in the save folder’s name, and can also be found in the Char0 file under the “<UID>” tag.
We’ll use “OLD-GFryZCBqXEGhEXQGMx” for our example.
You can play it until you reach Cierzo (or any part of the story) if you like, it doesn’t matter much.
Once you’ve quit out, find the new character’s UID. We’ll use “NEW-3pTMwz5R4t7pNMQpB5” for our example.
So you should have two “Char0” files. I recommend you leave the old character’s file name unchanged, and make the new character’s file name “New_Char0” for your own sanity and tracking.
New_Char0 here is the new save’s placeholder that won’t be surviving. Char0 is the old character you want in your new world.
FROM: “New_Char0”
TO: “Char0”
You’ll need to use “Find and Replace All” for this, as it can appear in hundreds of places.
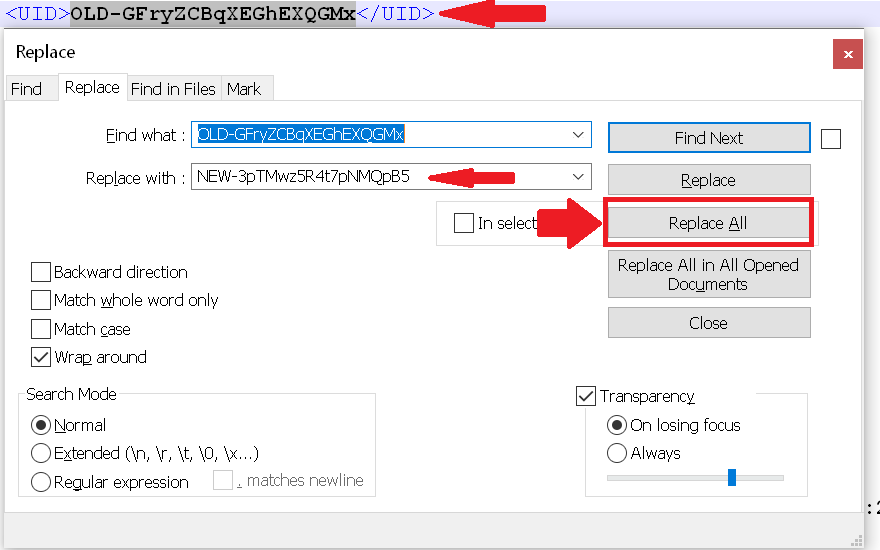
Remember that “NEW-3pTMwz5R4t7pNMQpB5” and “OLD-GFryZCBqXEGhEXQGMx” are examples only and not what you should be using.
On success, you should see something like this:
![]()
 FROM: “New_Char0”
TO: “Char0”
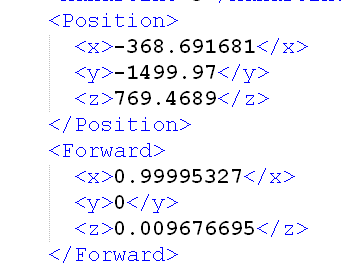
Copy the “Position” and “Forward” tagged sections; make sure you’re replacing the old ones and don’t have duplicates.
Copy “AreaName“‘s value too.
This means everything between “<StashLootGenerated>” and “</StashLootGenerated>”, and don’t leave empty lines.
Not actually a requirement but recommended for your own sanity.
Make sure to put the resulting “Char0.defedc” file in the new world, not the old one.
If you followed all those steps correctly, you should be able to load up your character in a brand new world.
1. You may have noticed your bag has a UID too, and we didn’t change it. The game likely requires/assumes all bag UIDs are unique. This might cause errors or undefined behavior if you attempt to, for example, split screen co-op two characters with the same bag UID. I haven’t tested.
2. I haven’t extensively tested putting an old character in a new world. It works on a basic level, but there might be oddities or errors as you get into it. But as mentioned in the introduction, this guide is just to get basic knowledge out there. Explore, experiment, and perhaps consider sharing your findings and refinements in a guide of your own. But here be dragons.